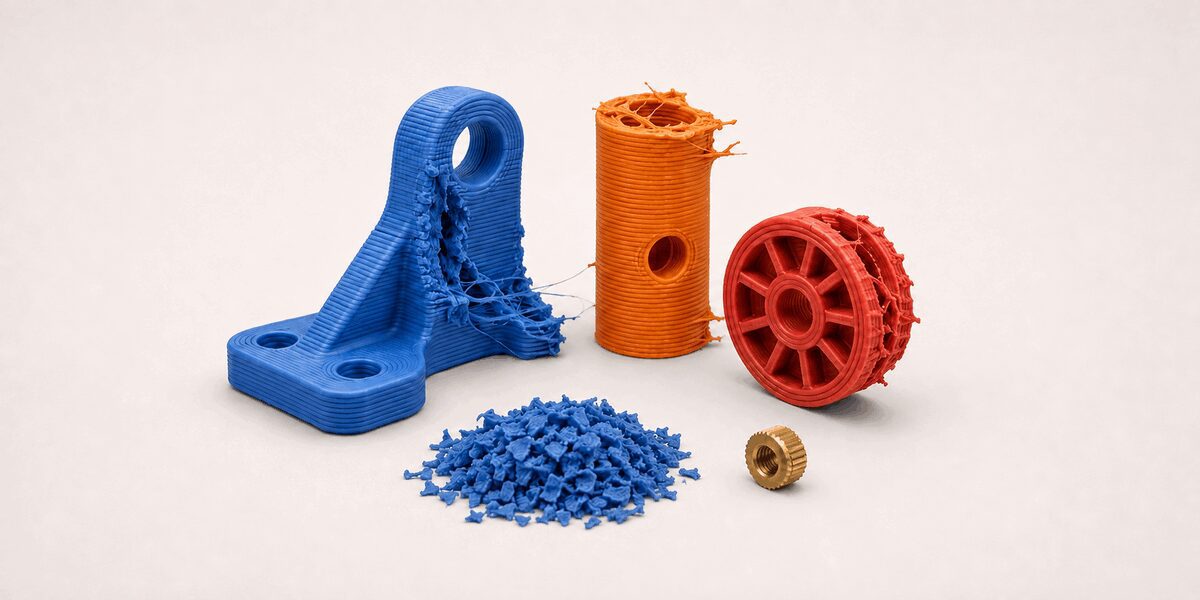
A failed 3D print may look like simple plastic waste. Yet it can hold many materials. They should not all enter the same recycling batch.
Support material, glue, paint, magnets, threaded inserts, labels, and dust can change the result. So can a small part made from another polymer. Once those items pass through a shredder, they are much harder to sort.
The best time to protect quality is before a failed print reaches the scrap bin.
This guide gives print farms, schools, labs, and shops a simple clean-stream method. The goal is not to build a perfect sorting plant. It is to keep each batch known and clean. It should then be fit for a small, controlled test.
Why one scrap bin causes problems
Many 3D-printing materials melt and flow at different heat levels. They can also shrink, take up water, or bond in different ways.
When an unknown plastic enters a known batch, the mix may no longer act like either source material. It may have a rough surface or an uneven size. It may also form weak spots or poor bonds between layers. A blend can be designed on purpose. An accidental mix is not a known blend.
Other waste can be just as harmful. Metal inserts can harm cutting tools or other equipment. Paper labels and tape can leave fibers or glue. Dust and grit can add wear. Oil, food, or cleaners can cause odor or deposits when heated. They may also give off fumes that were not expected.
The rule is simple. If the plastic or its condition is not known, keep it out of the planned batch.
Start with a clear acceptance policy
Before you collect failed prints, decide what the process will accept.
A small lab may start with just one material. One example is plain PLA from a known source. A print farm may keep separate streams for PLA, PETG, ABS, and other common plastics. A research group may need tighter control. It may sort by source, grade, color, or added compounds.
Write the policy where operators can see it. Include:
- Accepted polymer families
- Whether different colors may be combined
- Whether filled or reinforced grades are allowed
- Whether support materials are allowed
- Which coatings, adhesives, and hardware must be removed
- Which items must always go into quarantine
Resin codes can help name the broad type of plastic in some goods. They do not prove that an item can be used in your process. They also do not list each added compound, coat, or blend. For more background, see this overview of common plastic types and identification symbols.
For failed prints, check the slicer record, spool, and order record. Ask the person who ran the job. These facts are more useful than looks alone.
Separate material at the source
Sorting works best at the printer. At that point, the user still knows what went into the job.
Place clear, marked bins near the machines. Use one bin for each allowed stream. Use another bin for unknown or rejected scrap. When a printer changes from one polymer to another, keep the purge waste apart. Add it to the new stream only when the change is complete and known.
Do not use color as proof of polymer type. Two parts can look the same but use different resins. The same family can also contain glass or carbon fiber. It may contain a flame retardant, impact aid, or other added compound. Those changes can affect the process.
When traceability matters, give each collection container a batch card. Record:
- Material family and grade
- Supplier and product name
- Color or color group
- Filled, reinforced, or unfilled status
- Date range collected
- Printers or work area involved
- Known drying and storage history
- Operator initials
This takes less time than tracing an unknown extrusion fault later.
Remove foreign items before shredding
Check each part while it is still large and easy to handle.
Remove screws, nuts, washers, magnets, bearings, threaded inserts, wire, tape, labels, and large glue spots. Take apart items made from more than one material. Do not shred batteries or electronic parts. Keep out sealed or pressurized items. Also reject parts exposed to harmful chemicals.
Also check for hidden hardware. A heat-set insert may sit below the surface. A magnet may be sealed inside a print. If the build record is not clear, move the part to a hold bin. Do not guess.
Do this check before you reduce the part size. A metal insert is easy to see in a full bracket. It may be almost impossible to find once the bracket is in flakes.
Clean without creating a new problem
Failed prints from a clean shop may need only a dust check. Used goods can need much more work.
Match the cleaning method to the dirt and the polymer. Do not wash every part in the same way. Water, soap, solvent, heat, and long dry times can affect each material in a different way.
After a wet wash, dry the material before it is melted. Water on the surface is not the same as water held inside the plastic. Some polymers take up water from the air. They may need a set drying step for that grade.
Keep clean material covered. An open tray near sanding or machining work can collect dust and chips. Packing work can add fibers and bits of paper. All of this can happen before the tray reaches the shredder.
Shred one controlled batch at a time
Check that the shredder and work area are clean before you start a new material.
Flakes left from the last batch can enter the next one. Check the hopper, cutting chamber, screen, outlet, and scrap bin. Follow the equipment maker’s lockout and cleaning steps. Use the required safety gear.
Run only the amount assigned to the batch. Do not top up the hopper with loose scrap from an unmarked box. Keep the shreds in a closed bin. Use the same batch ID from start to end.
When you change polymers, use a written cleanout method. Treat the cleanout as mixed waste unless you can prove which stream it fits.
Test a small batch before scaling up
Clean sorting cuts risk. It does not make recycled material act just like new material.
Past heat, sunlight, water, pigments, added compounds, and prior use can all change a polymer. They can change how it flows and how strong it is. As more sources enter one batch, it gets harder to trace a change.
Begin with a small pilot. Record the processing conditions and observe:
- Melt stability
- Extrusion pressure or motor load, when available
- Surface consistency
- Output size and shape
- Unusual odor, smoke, or deposits
- Filament diameter stability, if producing filament
- Print quality and failure mode
Stop the test if the process is not stable. Also stop for odd fumes, deposits, or part failure. Do not solve an unknown-material fault by adding heat until the mix flows.
Keep a small, marked sample of the raw scrap and the output. These samples can help you compare one batch with another. They may also help with later tests.
Use simple stop rules
A recycling plan is easier to run when staff know when to stop.
Quarantine a part or batch when:
- The polymer cannot be confirmed
- Two material streams were mixed by mistake
- Hardware cannot be removed with confidence
- The part has an unknown coating or chemical exposure
- The batch contains an unapproved filled or reinforced grade
- Cleaning or drying history is missing where it matters
- A pilot extrusion behaves differently from the approved baseline
A hold bin does not always mean waste. It keeps the item out of the known stream. The item can wait until someone can name it, test it, or give it a low-risk use.
Build a process that can improve
The first version of a recycling plan does not need costly lab tools. It needs clear rules and useful records.
Track how much scrap enters each stream. Track how much is rejected and why. The same reject reason may point to a fix that saves time. A lab may need better bins near each printer. It may need a rule against magnets in parts meant for reuse. Support waste may need its own path.
As the plan grows, tools can help name a material. Heat and flow tests can add trust. These tools should support good source control, not replace it. Even a good lab test is less useful after many unknown streams have been mixed.
Protect quality before the shredder
Recycling failed 3D prints starts long before extrusion. It starts when the part leaves the printer.
A useful system keeps materials apart. It removes foreign items early and records each batch. It cleans and dries the scrap when needed. It also tests a small amount before a full run. These steps cut needless change and make faults easier to trace.
The shredder can reduce part size. It cannot restore information that was lost in a mixed scrap bin.