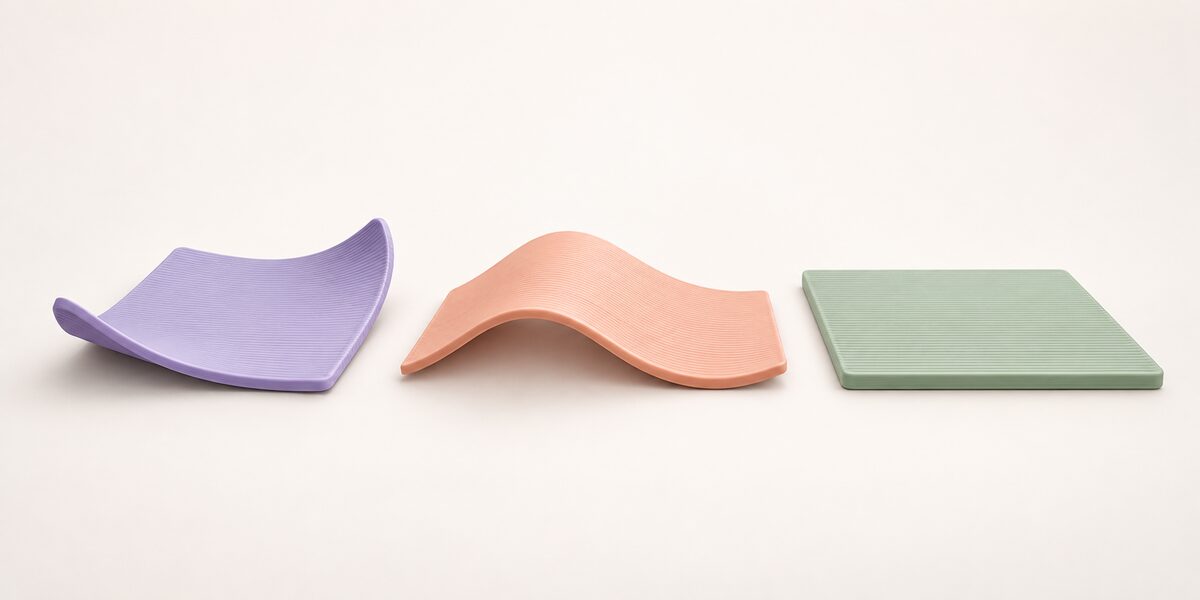
3D printing warping happens when a part bends away from its planned shape. A corner may lift during the print. A long wall may curve. A flat part may twist after it leaves the build plate.
The first step is to describe the change. A warped 3D print can come from uneven cooling, weak contact with the build surface, part geometry, or several causes at once.
This guide explains how to prevent warping through controlled tests. It does not offer one temperature or adhesive for every material.
The goal is a stable process. Use the baseline to prevent warping. First define the defect. Then change one cause and print the same test again. This 3D printing warping method helps prevent warping and classify each warped 3D print.
What Causes 3D Printing Warping?
Material-extrusion printing places hot polymer in many thin paths. Each path expands when warm. It then contracts as it cools.
The whole part does not cool at the same time. New layers may stay warm while lower layers become firm. Thick and thin areas may cool at different rates. This can change the final shape.
If one region contracts more than another, stress builds. That stress sits inside the part. The part may stay flat while the build plate holds it. It may bend when that hold becomes weak or after the part is removed.
A 2017 temperature-mapping study measured changing heat patterns in printed polymer plates. It found large temperature gradients during printing. The exact values belong to that test system. Still, the result supports the basic thermal cause of 3D printing warping.
Good steps to prevent warping reduce sharp changes in temperature, contraction, and restraint. They also keep the first layer attached long enough for the print to finish. Use the 3D printing warping record to compare each warped 3D print.
Name the Warped 3D Print You See
Do not place every bent part in one category. Record where and when the warped 3D print changed.
- Corner lift begins at one edge during printing.
- Base curl raises a larger part of the first layers.
- Wall bowing curves a tall or long wall.
- Twist rotates one area relative to another.
- Post-release warp appears after the part leaves the plate.
- Local distortion appears near a thick section, hole, or support.
Take a photo from the same angle each time. Measure the largest gap at fixed points. Note the layer or time when movement began.
This record makes 3D printing warping easier to compare. Use it to prevent warping and compare each warped 3D print. It also stops a team from calling every first-layer problem a thermal problem.
Separate Adhesion From Thermal Distortion
Build-surface adhesion and thermal contraction interact. They are not the same thing.
A dirty plate or wrong surface can release a corner. Poor first-layer height or low contact area can do the same. The part can then move even when its thermal stress is modest.
A very strong hold can hide stress until removal. The part may look flat on the plate. It may become a warped 3D print minutes later.
Inspect the first-layer imprint. Check whether the full base made contact. Look for a release line at the lifted edge.
Then let the part cool by the same method before removal. If it bends only after release, test thermal balance and geometry before adding more adhesive.
To prevent warping, treat adhesion as one part of the process. This 3D printing warping check shows whether a warped 3D print lost contact first. Do not use adhesion to cover every other cause.
Start With the Material Maker’s Range
Different polymers and grades shrink in different ways. Fillers, colorants, moisture, and prior heat history can also change the result.
Use the current technical data for the exact grade. Start within its nozzle, plate, chamber, and cooling guidance. Check the spool and printer limits too.
Do not copy one setting from PLA to every other plastic. ABS, PA, PC, PE, and filled blends need their own checks. A 2023 study compared PEI, ABS, and PA6. It found material-dependent effects on simulated stress and warpage.
That study does not give a universal profile. It supports a safer rule: tune 3D printing warping by exact material and setup. This helps prevent warping without treating every warped 3D print as the same fault.
Keep the material identity and lot with every test. If the material is unknown, place it on hold instead of guessing.
Stabilize the First Layer
A sound first layer gives the part a repeatable start. Clean the build surface by the maker’s approved method.
Check that the plate is flat enough for the planned area. Confirm the nozzle offset and first-layer flow with a simple pattern.
The deposited paths should join without deep ridges, open gaps, or heavy scraping. A wider first-layer line may help some approved profiles. It cannot fix a damaged or dirty surface.
Use a surface that is compatible with the exact polymer. Follow the plate and material maker’s guidance for adhesives and release methods.
Avoid untested chemical mixtures. They may damage the plate, add fumes, or make removal unsafe.
This first-layer check can prevent warping caused by early release. A second repeat can prevent warping from being judged by one lucky result. It gives each warped 3D print a clear 3D printing warping baseline. Save the result before changing heat or cooling.
Control Airflow Around the Part
Moving air can cool one edge faster than another. A nearby vent, open door, fan, or air conditioner may create a repeat fault.
Map the airflow before changing the profile. A light strip of tissue held safely away from hot and moving parts can show room drafts. Do not place loose material inside the printer.
Use the printer’s approved enclosure or draft protection when the material calls for it. Never cover vents, power parts, or fire controls with an improvised box.
Follow the printer maker’s temperature and safety limits. Do not add an unapproved heater or defeat a door, fan, sensor, or thermal interlock.
A stable surrounding temperature may help prevent warping for some materials. Use each warped 3D print to judge the 3D printing warping response. Too much heat can harm electronics, soften parts, or create other defects.
Record room, enclosure, and cooling-fan conditions in every 3D printing warping test. These facts help prevent warping and explain each warped 3D print.
Tune Plate Temperature With a Small Test
Plate heat can slow cooling near the base. It can also support adhesion. More heat is not always better.
If the plate is too cool for the material, the base may contract early. If it is too hot, lower features may soften, spread, or stay dimensionally unstable.
A 2023 PA12 study tested several print settings. Build-plate heat had a clear effect on warpage in its model and tests. Other parameters also mattered.
Use a small flat coupon with the same base thickness and corner shape as the real part. This 3D printing warping sample can prevent warping tests from wasting a full build and can match the warped 3D print. Test a few values within the approved range.
Measure corner lift, base size, surface quality, and removal behavior. Select the lowest-risk setting that meets the part’s needs.
This method helps prevent warping without turning one successful print into a universal rule. It also links 3D printing warping to a measured warped 3D print.
Use Cooling for the Feature, Not by Habit
Part cooling helps small features become firm. It can help overhangs too. It can also increase a temperature difference across a large part.
Do not assume that zero fan or full fan will prevent warping. Use a measured step to prevent warping without hiding another fault. The right amount depends on the material, feature time, printer, and surrounding air.
Watch where the warped 3D print begins. If the fault starts when cooling changes, repeat the test with one controlled fan step.
Use slower fan changes when the slicer supports them. Give short layers enough time without blasting one side of the part.
Check bridges and overhangs after each change. A setting that reduces base curl may harm another feature.
Save the cooling curve with the 3D printing warping result. Use it to prevent warping and compare each warped 3D print.
Choose Orientation With Heat Flow in Mind
Orientation changes the base area and layer length. It also changes support needs and the cooling path. It also changes strength and surface finish.
A broad flat face may give strong plate contact. It may also create long paths and a large area that contracts together.
A rotated part may reduce the base area or break one long layer into shorter sections. Yet it may need more support or place layers across a load.
The Polystruder guide to 3D print layer adhesion explains why orientation must also match the load path.
Try two practical orientations as small sections before printing the full part. Compare warp, support marks, size, time, and strength needs.
Orientation can prevent warping only when the new tradeoffs remain acceptable. Record the 3D printing warping result and any warped 3D print after release.
Change Geometry Before Adding Process Complexity
Sharp corners and sudden thickness changes can focus stress. Long thin plates can also amplify a small temperature difference.
Round outside corners when the design allows it. Use gradual thickness changes. Divide a large flat part into sections when assembly is practical.
Add ribs with care. A heavy rib can create a new thick region and a new cooling mismatch. Use local tests before changing the whole model.
A small relief or split line may help the part move as it cools. A changed wall path may help too.
Do not add material everywhere by default. More mass can increase time, cost, and thermal stress.
For 3D printing warping, start with a small geometry change. Keep it only if it can prevent warping across repeats. Record every warped 3D print, not only the best result.
Use Brims and Rafts as Controlled Tools
A brim adds attached paths around the first layer. It can increase edge contact and delay corner lift.
A raft creates a separate printed base below the part. It can change contact and removal. It also uses more material and may harm the lower surface.
Neither tool removes internal stress. A part held flat by a raft can still become a warped 3D print after release. Record that 3D printing warping result before using the tool to prevent warping again.
Use a brim when edge contact is the likely weak point. Record brim width and removal quality.
Use a raft only when its cost and surface effect make sense for the job. Do not treat it as the first fix for every case.
These tools can help prevent warping after material, plate, airflow, and first-layer checks are sound. Compare the 3D printing warping result and each warped 3D print after release.
Check Moisture and Flow Before Blaming Heat
Uneven flow can change line width and first-layer contact. Moisture or a partial clog can cause unstable flow. Worn drive parts or a wrong flow setting can do the same.
The Polystruder guide to filament moisture control shows how to compare a suspect spool with a known control.
Listen for new popping. Look for bubbles, gaps, rough paths, or a changing free-air strand. Treat these signs as clues, not proof.
Check the nozzle, feed path, temperature stability, and material history. Then print the same small coupon.
A warped 3D print with poor flow needs a flow diagnosis too. Fix the flow before using heat to prevent warping. This keeps the 3D printing warping test focused. Better adhesion cannot make an unstable stream consistent.
Measure Warping the Same Way
A flat result needs a stated limit. “Looks good” is hard to compare across people and shifts.
Let each sample cool for the same time and by the same method. Measure it on a clean reference surface.
Record the largest corner gap, diagonal twist, or wall bow at fixed points. Use the same tool and light contact force.
The Polystruder 3D printing accuracy guide explains how averages and spread make dimensional checks more useful.
Print at least three comparable samples before calling a change stable. One flat part may hide process variation.
Keep photos, settings, material lot, orientation, and measurements with each 3D printing warping trial. These records help prevent warping and compare each warped 3D print.
Run a One-Variable Warping Test
Start with a short coupon that copies the real part’s risky feature. Use the same material, base thickness, corner radius, and orientation.
- Save the current printer, material, profile, and room conditions.
- Print the baseline sample.
- Measure the warped 3D print at fixed points.
- Choose one likely cause.
- Change one approved variable.
- Print and measure the same coupon again.
- Repeat the better result at least twice.
- Confirm the full part after the coupon passes.
A test may change plate heat, cooling, orientation, first-layer setup, brim, or one geometry feature. Do not change several at once.
This approach helps prevent warping and keeps cause and effect visible. Repeat the 3D printing warping test for every warped 3D print pattern.
Know When to Stop
Stop the test if the printer exceeds its approved temperature or gives a thermal warning. Stop too if it smells odd or shows damaged wiring or surfaces.
Do not leave an unsafe printer running to complete a comparison. Follow the maker’s shutdown and service instructions.
Stop changing settings when the material identity is unclear. Stop if a chemical or build surface has no safe-use guidance.
A functional or safety-related part may need formal process control, inspection, and engineering review. A flat print is not proof that the part is safe.
3D printing warping is one quality result. Strength, fit, heat, impact, fatigue, and chemical exposure may also control the design.
3D Printing Warping Checklist
- Name where and when the warp begins.
- Measure the same points after the same cooling time.
- Confirm material grade, lot, and approved ranges.
- Clean and check the build surface.
- Verify first-layer height, flow, and full contact.
- Map room drafts and printer cooling.
- Test plate heat within the approved range.
- Compare practical part orientations.
- Review corners, thickness changes, and long flat areas.
- Use a brim or raft only for a clear reason.
- Check moisture and flow stability.
- Change one variable and repeat the sample.
Use this list to prevent warping without random tuning. Apply the same 3D printing warping checks to each warped 3D print. Save every result, including the failed ones.
Build a Repeatable Flat-Part Process
3D printing warping is easier to solve when the defect has a name and a clear measure. It also needs a repeat test.
Begin with the exact material and approved operating range. Stabilize the first layer. Control airflow and cooling. Then review orientation and geometry.
A warped 3D print is evidence. It shows where the current balance of heat, contraction, and restraint did not work.
Use that evidence to change one cause at a time. Repeat the better result before moving to the full part.
That method can prevent warping more reliably than a copied heat setting or extra adhesive. It also avoids a long list of changes made at once.